> ## Documentation Index
> Fetch the complete documentation index at: https://developer.hubmessage.io/llms.txt
> Use this file to discover all available pages before exploring further.
# Payment
> Set up a payment method to send message templates through the WhatsApp Official API
export const frontendUrl = 'https://app.hubmessage.io';
export const projectName = 'Hub Message';
## Overview
To use the **WhatsApp Official API**, you need to set up a payment method. This setup enables you to send **message templates**.
## Requirements
* **Business Portfolio (BM)**: you need to have a business portfolio set up with the WhatsApp number already linked
* **Required permission**: you'll need to be an administrator or have the necessary permissions to configure payments on the relevant WhatsApp account
## Step by step
### Step 1 - Access your Meta account
Go to: [business.facebook.com](https://business.facebook.com/)
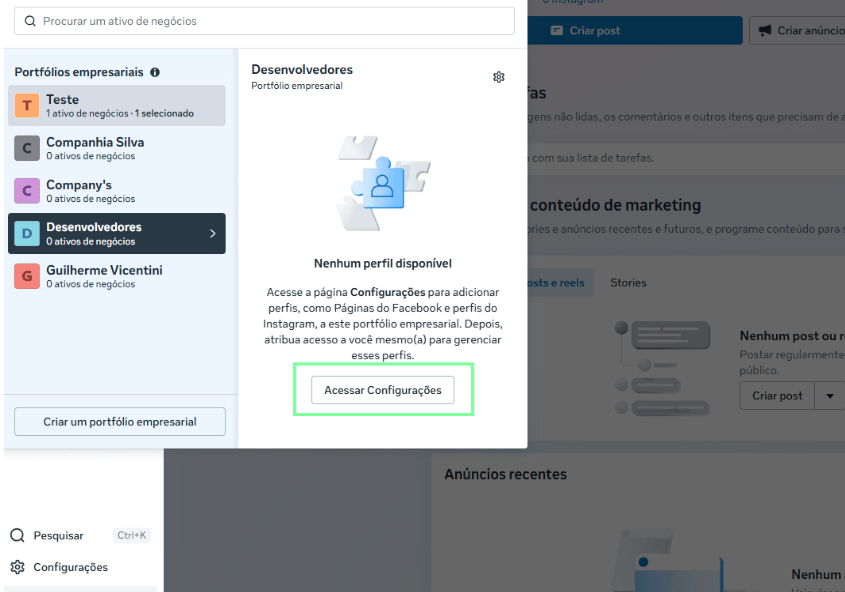
### Step 2 - Access the Business Portfolio (BM)
* Click to select the Business Portfolio
* Click to access this portfolio's settings
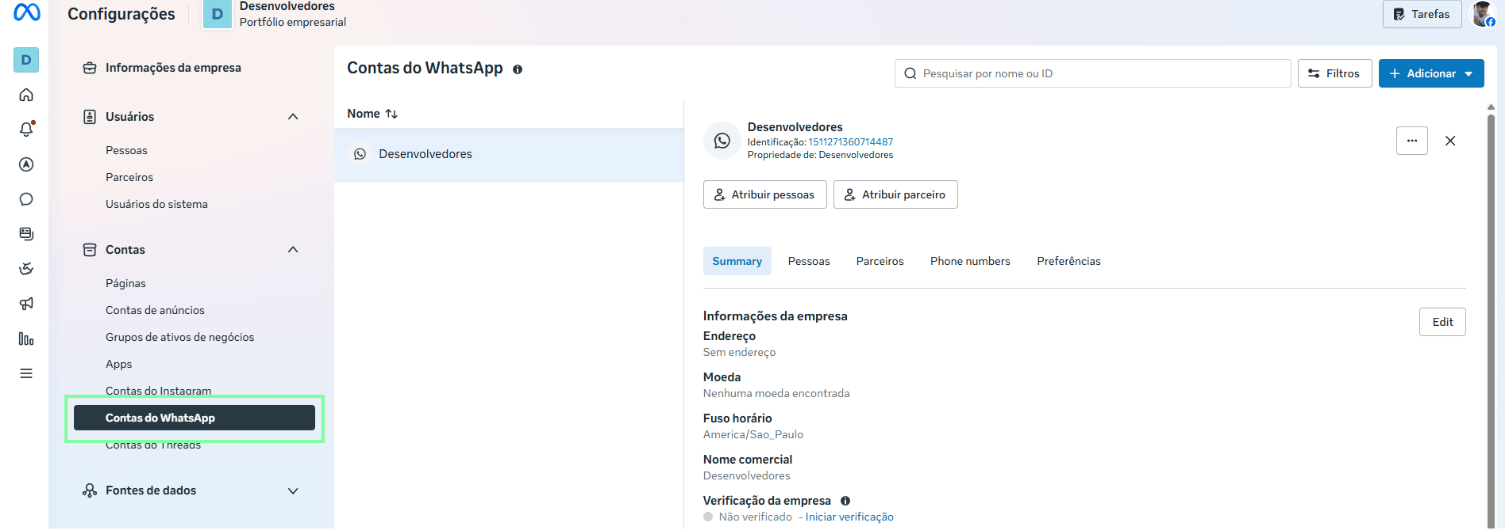
 ### Step 3 - Access the WABAs (WhatsApp Accounts)
* Click **WhatsApp Accounts**
### Step 3 - Access the WABAs (WhatsApp Accounts)
* Click **WhatsApp Accounts**
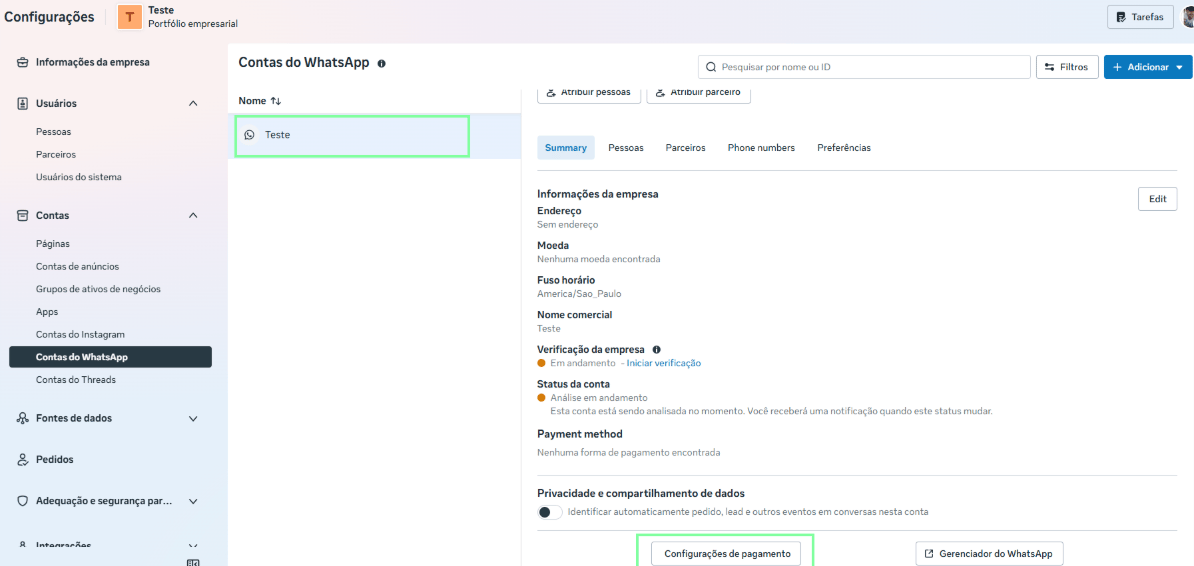
 ### Step 4 - Access the payment settings
* Select the relevant account
* Then select **"Payment settings"**
### Step 4 - Access the payment settings
* Select the relevant account
* Then select **"Payment settings"**
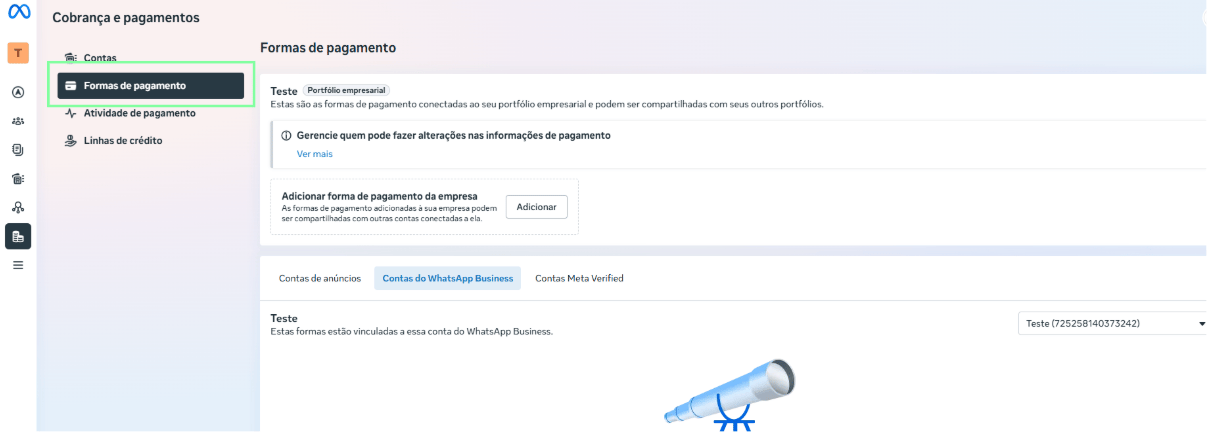
 ### Step 5 - Access the payment method setup
* Select the **Payment methods** menu item
Do not set this up through the **Accounts** option, as Meta's system won't be able to properly validate this method, causing invoice processing issues.
You need the required permissions to make changes on this screen.
### Step 5 - Access the payment method setup
* Select the **Payment methods** menu item
Do not set this up through the **Accounts** option, as Meta's system won't be able to properly validate this method, causing invoice processing issues.
You need the required permissions to make changes on this screen.
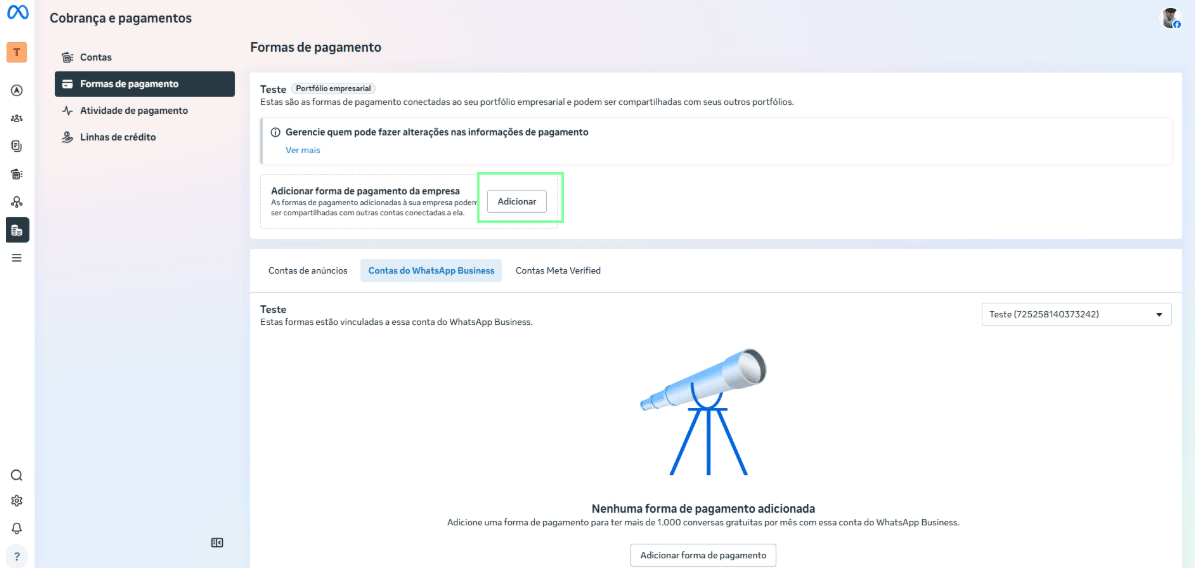
 ### Step 6 - Add a payment method
* Click **Add** to start the payment method setup process
### Step 6 - Add a payment method
* Click **Add** to start the payment method setup process
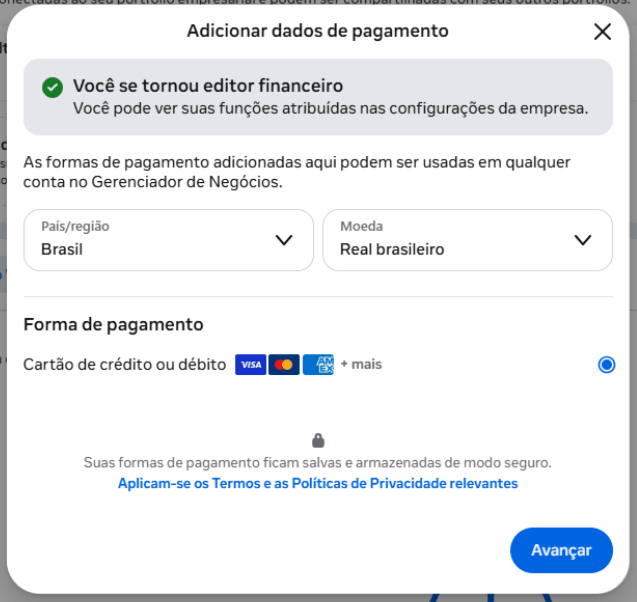
 ### Step 7 - Fill in the country and currency
* Set the country to **Brazil**
* Select **US dollar (USD)** as the currency. This is required because Meta uses the dollar as the base currency, but it converts to Brazilian reais on your card's invoice afterward
* Then click **Next**
### Step 7 - Fill in the country and currency
* Set the country to **Brazil**
* Select **US dollar (USD)** as the currency. This is required because Meta uses the dollar as the base currency, but it converts to Brazilian reais on your card's invoice afterward
* Then click **Next**
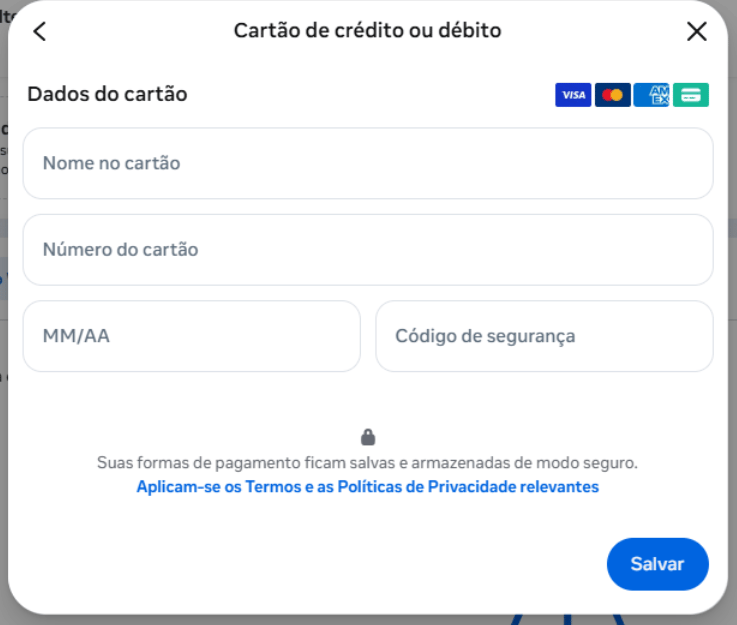
 ### Step 8 - Fill in the card details
* Fill in all the card details and click **Save**
- Since processing happens in dollars, the card needs to be enabled for **international purchases**
- The amount charged will be based on the dollar exchange rate on the day the invoice closes
### Step 8 - Fill in the card details
* Fill in all the card details and click **Save**
- Since processing happens in dollars, the card needs to be enabled for **international purchases**
- The amount charged will be based on the dollar exchange rate on the day the invoice closes
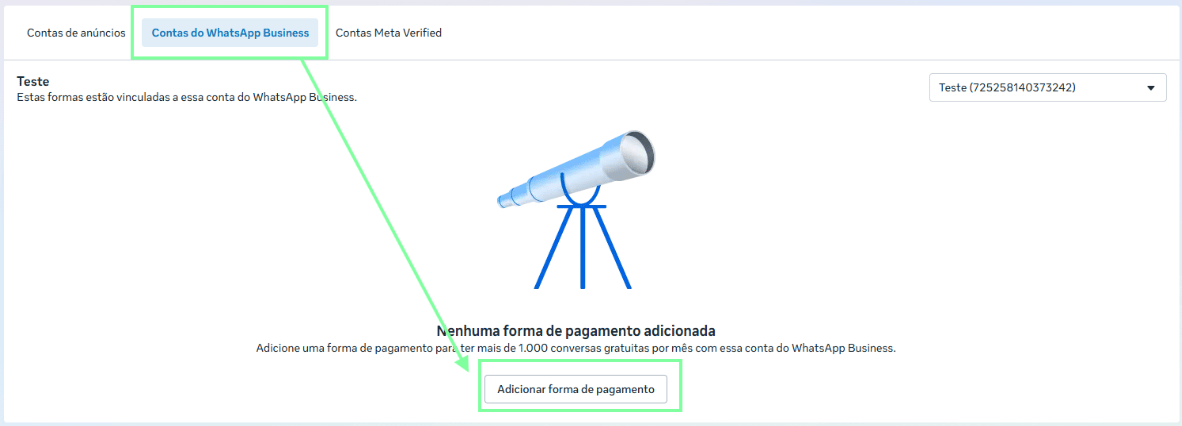
 ### Step 9 - Add the card to the WhatsApp Business account
* After entering a card, click the **WhatsApp Business Accounts** tab
* Then click **Add payment method**
* Add the card you previously registered and link it to complete the process
### Step 9 - Add the card to the WhatsApp Business account
* After entering a card, click the **WhatsApp Business Accounts** tab
* Then click **Add payment method**
* Add the card you previously registered and link it to complete the process