> ## Documentation Index
> Fetch the complete documentation index at: https://developer.hubmessage.io/llms.txt
> Use this file to discover all available pages before exploring further.
# Cloud API
> Connect a number to the WhatsApp Official API through the Cloud API
export const frontendUrl = 'https://app.hubmessage.io';
export const projectName = 'Hub Message';
## Overview
The **Cloud API** lets you connect a number directly to the **WhatsApp Official API** through your Meta Business Account (Business Manager). This is the most traditional method for new numbers and gives you access to all the features available on the platform.
## Requirements
* **Business Portfolio (BM)**: you need to have a business portfolio set up (verified, if possible. This gives the BM more credibility with Meta)
* **Account administrator**: you'll need to have an administrator profile on the business account and on Facebook
* **The number must not be in the WhatsApp app**: to use this connection method, the number can't be active in the WhatsApp app. You'll need to disconnect it from the app first. The process between disconnecting and attempting a connection to the Official API through the Cloud API can take a few minutes
* **A number that can receive SMS or calls**: you need a number that can receive an SMS or a phone call, since Meta will send a verification code
## Adding a number through Meta
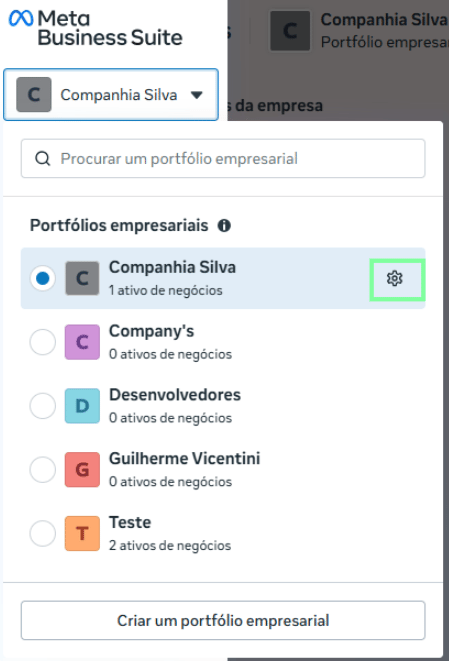
### Step 1 - Access the Business Portfolio (BM)
* Go to: [business.facebook.com](https://business.facebook.com/)
* Click the gear icon for the relevant Portfolio
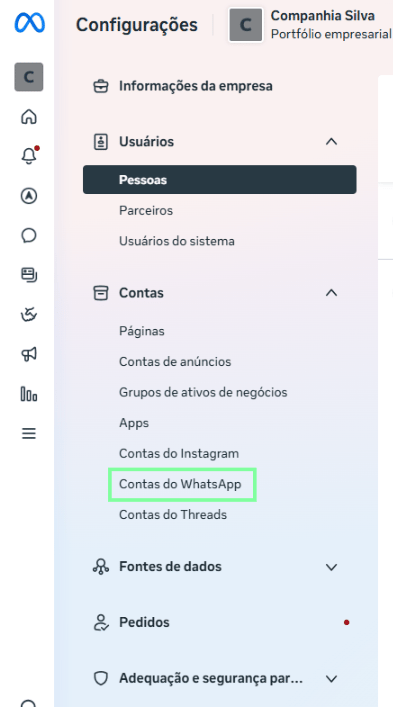
 ### Step 2 - Access the WABA (Business Account) screen
* Click **"WhatsApp Accounts"**
### Step 2 - Access the WABA (Business Account) screen
* Click **"WhatsApp Accounts"**
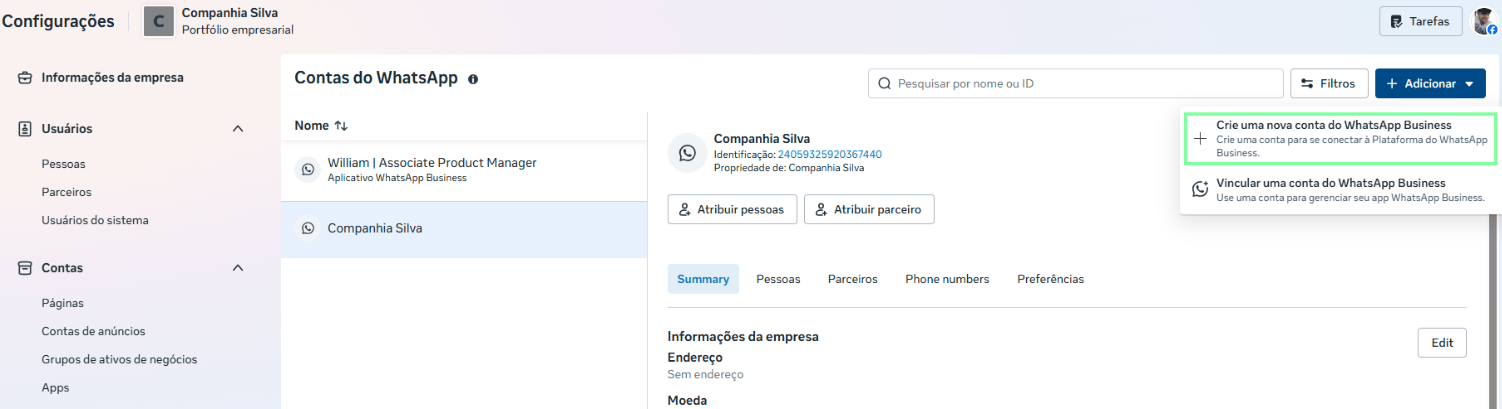
 ### Step 3 - Add a new WABA and a new number
You can add a WABA directly through Meta.
* Click the **Add** button
### Step 3 - Add a new WABA and a new number
You can add a WABA directly through Meta.
* Click the **Add** button
 * Click **Create a new WhatsApp Business account**
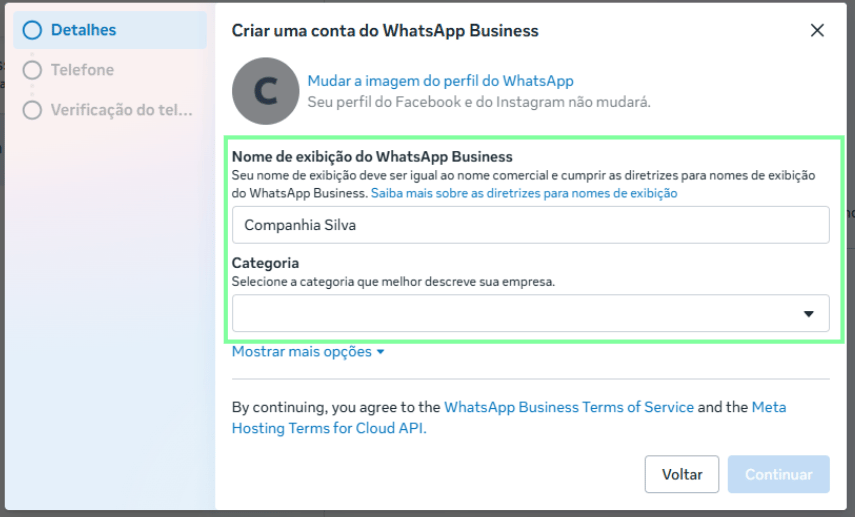
 ### Step 4 - Fill in the business information
* **Set up the WhatsApp display name**: it's important that it matches your business name and follows [Meta's guidelines](https://www.facebook.com/business/help/757569725593362)
* **Select a category** that matches your business (Automotive, Education, etc.)
### Step 4 - Fill in the business information
* **Set up the WhatsApp display name**: it's important that it matches your business name and follows [Meta's guidelines](https://www.facebook.com/business/help/757569725593362)
* **Select a category** that matches your business (Automotive, Education, etc.)
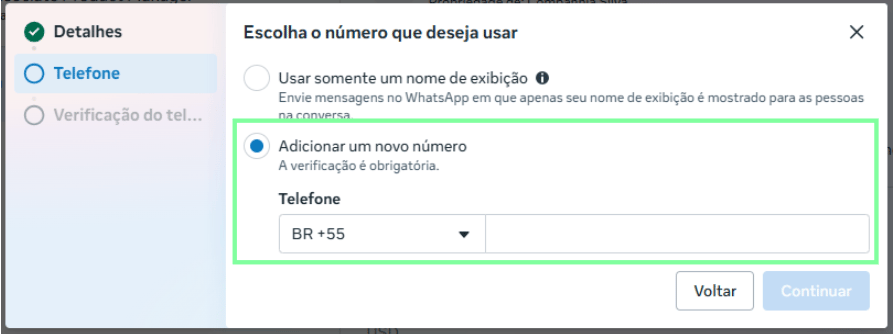
 ### Step 4 - Choose the number
You'll have two options to choose from:
* **Use a display name**: with this option, Meta creates a virtual number (which can't receive calls or SMS) and only the display name is shown to the customer on WhatsApp
* **Add a number**: with this option, you'll need to add a new number
### Step 4 - Choose the number
You'll have two options to choose from:
* **Use a display name**: with this option, Meta creates a virtual number (which can't receive calls or SMS) and only the display name is shown to the customer on WhatsApp
* **Add a number**: with this option, you'll need to add a new number
 ### Step 5 - Verify a phone number
If you choose the **"Add a number"** option, you'll need to verify your phone.
* Choose **SMS** or **Call**
After that, your number will be validated and you'll be able to use it to connect.
It's important to set up a payment method in order to send templates.
### Step 5 - Verify a phone number
If you choose the **"Add a number"** option, you'll need to verify your phone.
* Choose **SMS** or **Call**
After that, your number will be validated and you'll be able to use it to connect.
It's important to set up a payment method in order to send templates.